Connect Odoo to erp2pdf.com: install the connector step by step
Install the free PDF Builder Connector in Odoo, paste two values from your erp2pdf.com cabinet, and print quotations, products and contacts with templates you designed in Studio. The PDF is downloaded and attached to the record.
Before you start
- Odoo 18 or Odoo 19, and an Odoo administrator account.
- Sales installed in Odoo. The module depends on Sales, Products and Discuss.
- An erp2pdf.com account on the Pro plan or higher. Any
plan can create API tokens, but generating PDFs from Odoo and listing
your templates there need Pro, Enterprise or Agency; on Free, Odoo
shows
upgrade_required. Each PDF uses credits from your plan. See pricing. - A template in Studio bound to the Odoo model you print
from:
sale.order(quotations and orders),product.template(products) orres.partner(contacts). - A public https address for your Odoo, such as
https://erp.your-company.com. Plainhttpis refused: the connection carries your records and credentials.
One Odoo per account. The first successful call from Odoo locks your erp2pdf.com account to that Odoo's address. Calls from any other address are refused afterwards, so set the right public address (step 6) before you print the first PDF. If you move Odoo later, write to [email protected] to unlock it.
Step 1. Create an account or sign in
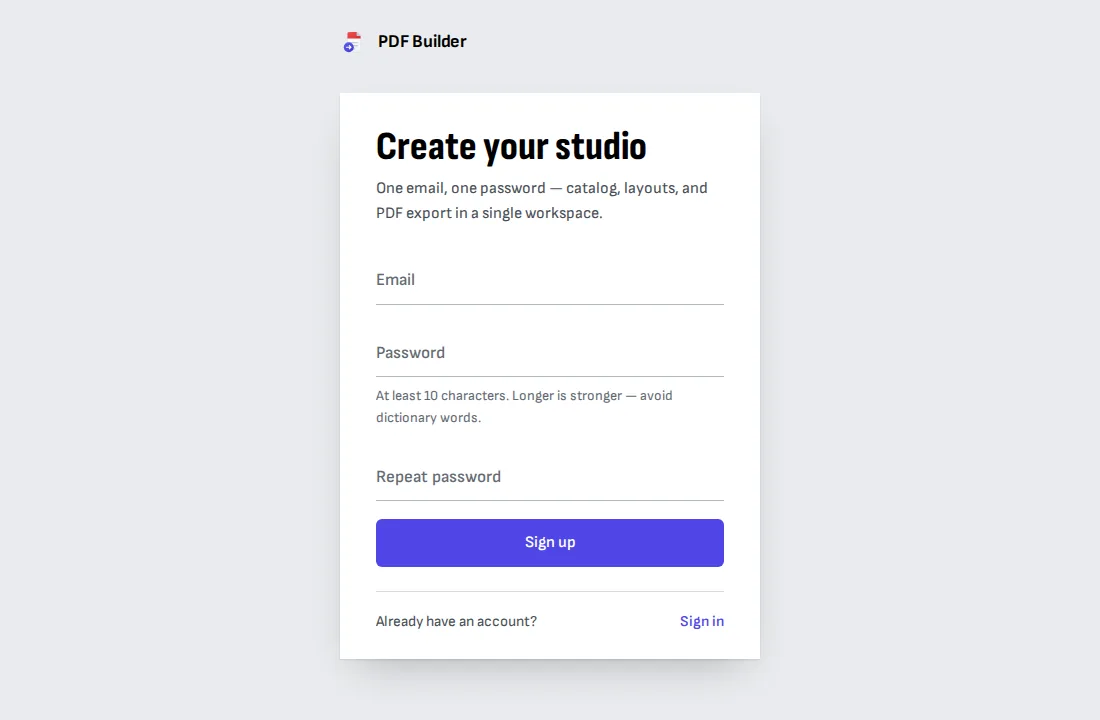
Create an account at erp2pdf.com/signup, or sign in if you have one, and confirm your email from the message we send.
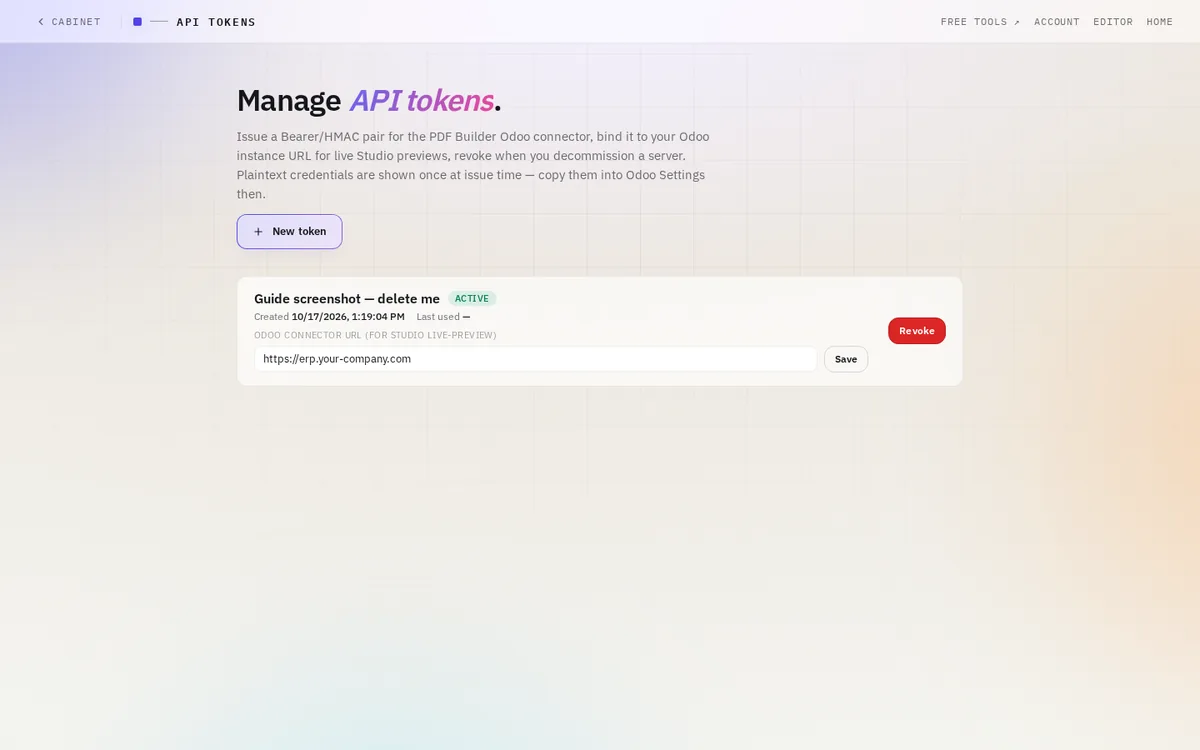
Step 2. Open API tokens in your cabinet
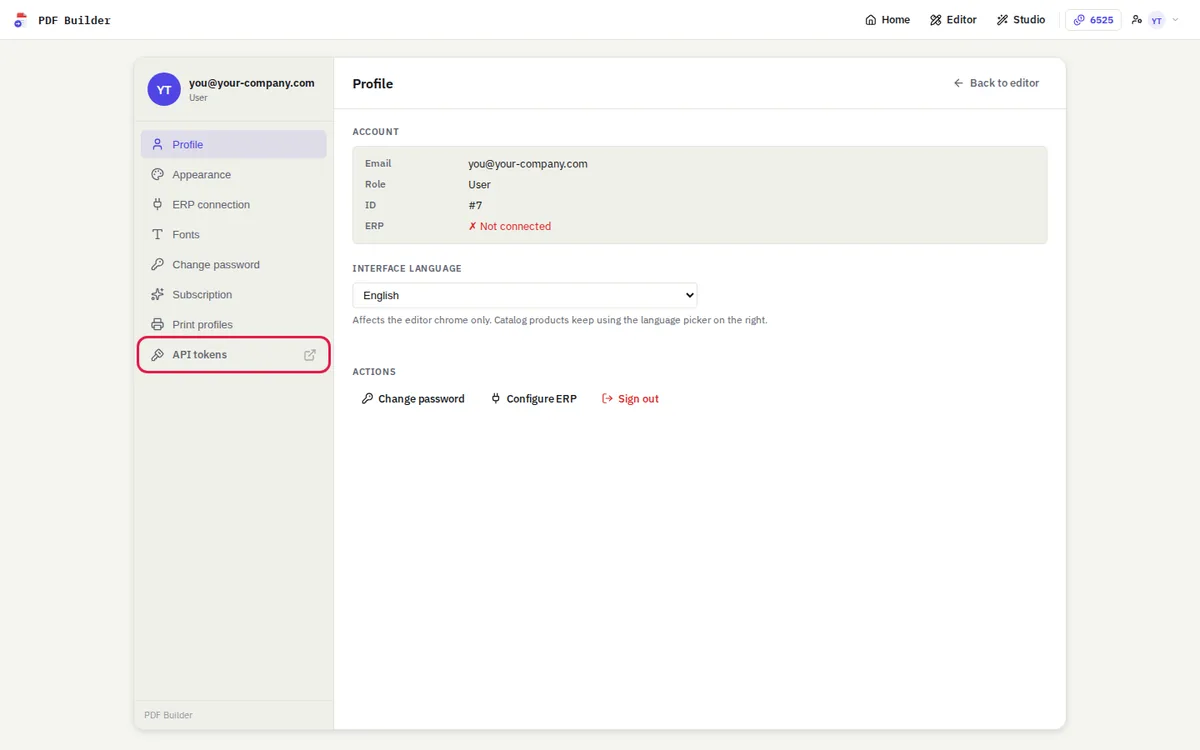
Open your cabinet and choose API tokens, or go straight to erp2pdf.com/cabinet-tokens. Only an account admin can create tokens.
Step 3. Create a token for your Odoo
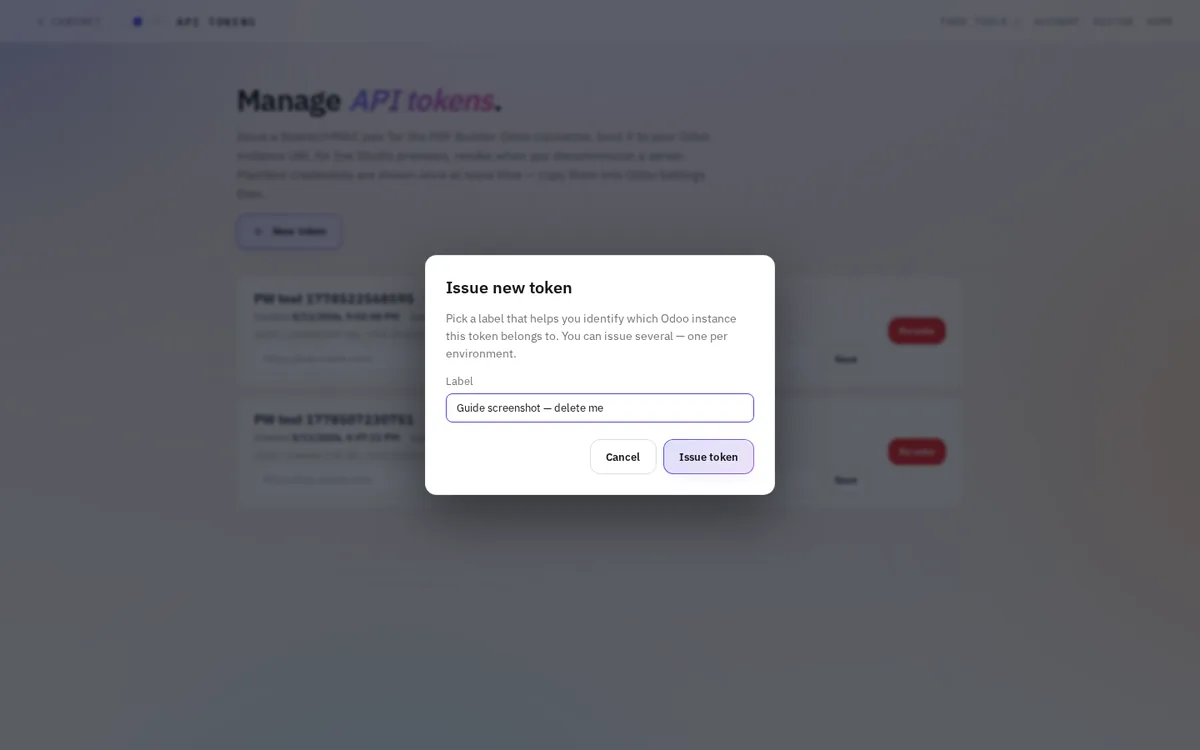
Click New token, give it a name you will recognise later (the name of your Odoo database works well) and click Issue token.
Step 4. Copy the API token and the HMAC secret
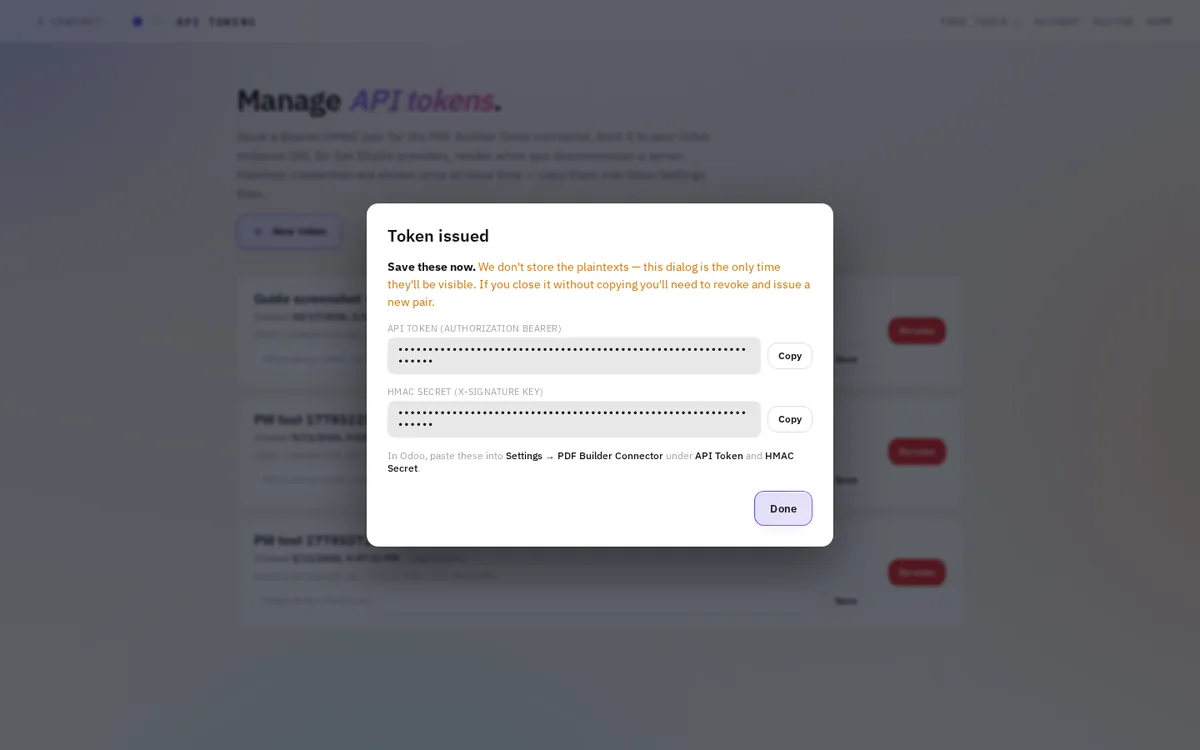
The Token issued dialog shows two values:
- API token identifies your account;
- HMAC secret signs every request between Odoo and erp2pdf.com.
Copy both with the Copy buttons, into a password manager or straight into Odoo (step 7). They are shown only once. We keep the token only as a hash and the secret encrypted, so nobody can show them to you again; if you close the dialog without copying, revoke the token and create a new one.
Treat the pair like a password: whoever has both can print PDFs on your account and read the records the connector exposes.
Click Done. The token appears in the list. You don't need to fill in Odoo connector URL here: it is filled in the first time your Odoo connects.
Step 5. Install the module in Odoo
The PDF Builder Connector is free; the current version is 1.3 (18.0.1.3.2 for Odoo 18, 19.0.1.3.2 for Odoo 19). It is being prepared for the Odoo Apps Store; until the listing is live, write to [email protected] with your Odoo version and we will send you the zip.
Copy the pdf_builder_connector folder into a directory on
your Odoo addons path (on Odoo.sh, add it to your repository), then in
Odoo:
- Turn on developer mode (Settings → Activate the developer mode).
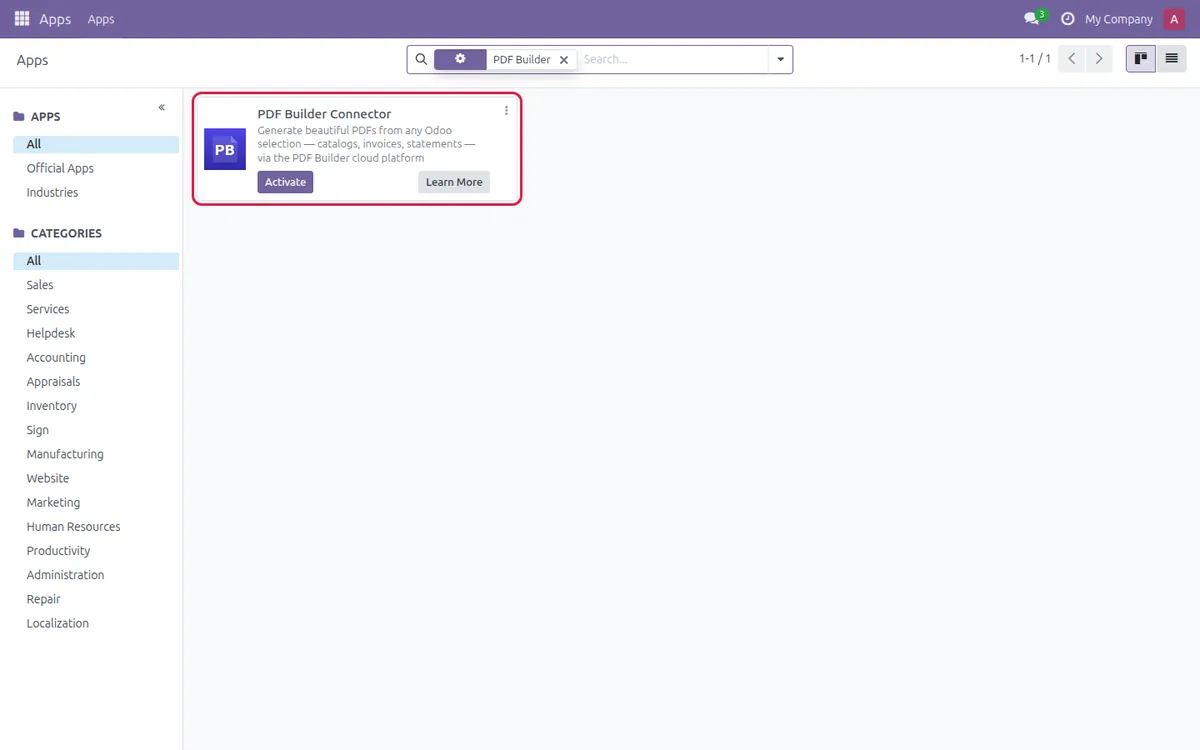
- Open Apps and click Update Apps List.
- Remove the Apps filter from the search bar, search for PDF Builder, and click Activate on PDF Builder Connector.
Upgrading from an older version? Replace the folder with
the new one, click Update Apps List, then
Upgrade on the module. Your token and secret are kept,
and a saved SaaS URL that still points to an old address is moved to
https://erp2pdf.com.
Step 6. Check your Odoo's public address
Open Settings → Technical → System Parameters (developer
mode) and check web.base.url. It must be the https address
your users and erp2pdf.com reach Odoo at, for example
https://erp.your-company.com — not
http://localhost:8069 or an internal IP.
The connector sends this address with every request, and the first one locks your account to it.
Step 7. Paste the values into Odoo
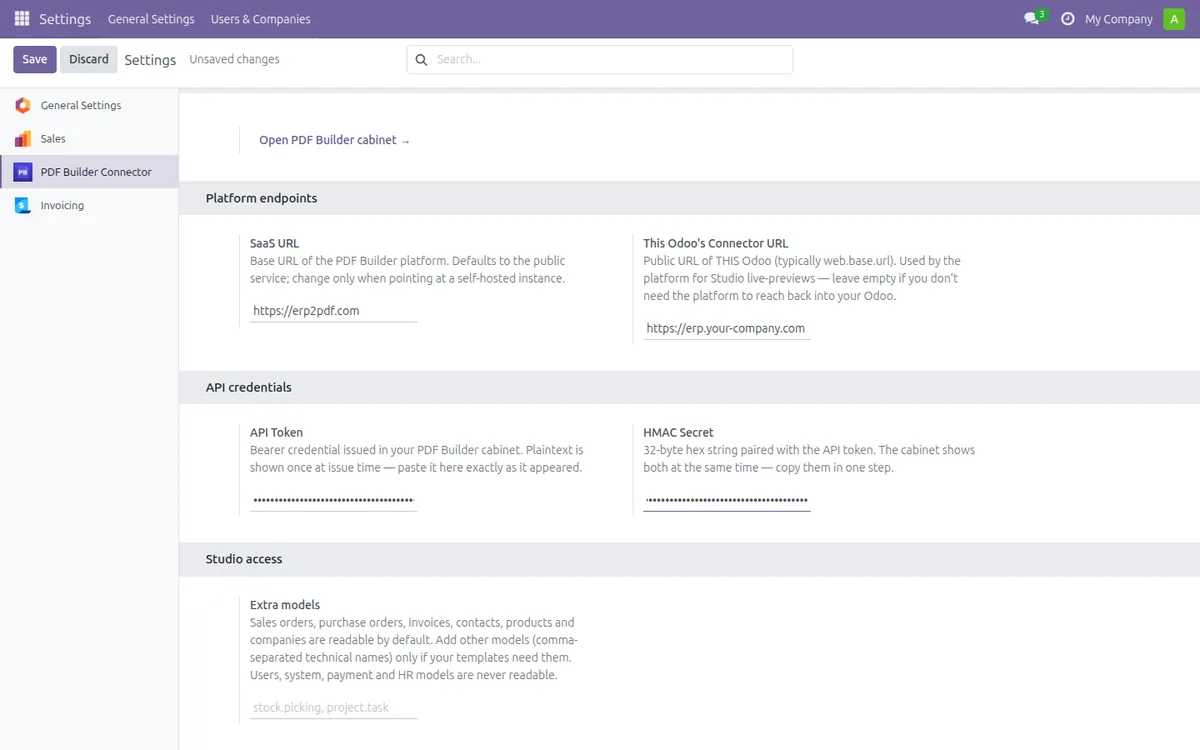
Open Settings → PDF Builder Connector and fill in:
| Field | What to enter |
|---|---|
| SaaS URL | https://erp2pdf.com |
| This Odoo's Connector URL | Your Odoo's public address, the same as web.base.url. Leave it empty to use web.base.url. |
| API Token | The API token from step 4 |
| HMAC Secret | The HMAC secret from step 4 |
| Extra models (Studio access) | Usually empty. Sales orders, purchase orders, invoices, contacts, products and companies are covered; list other models here only if your templates need them, e.g. stock.picking. |
Paste the values exactly, with no spaces or line breaks, and click Save. The token and secret stay masked on screen.
Step 8. Generate your first PDF
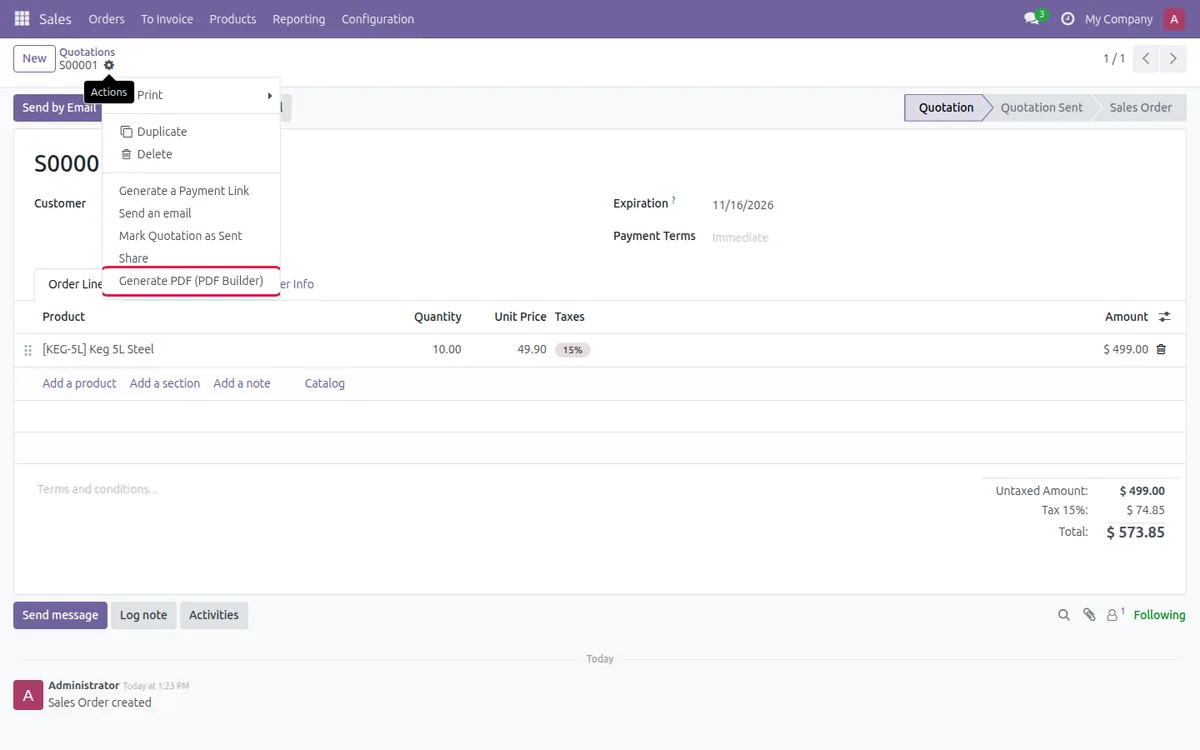
- Open a quotation (or a product, or a contact) in Odoo.
- Click the gear icon (Actions) and choose Generate PDF (PDF Builder). In a list you can select several records first; they go into one PDF.
- Pick a template. Only templates bound to the record's model are listed.
- Click Generate PDF.
The PDF downloads and is attached to the record's chatter. This first call also locks your account to this Odoo and fills in the connector URL on your token in the cabinet.
To check the link from the other side, open a template bound to the same model in Studio and use the Sample picker to preview one of your real Odoo records.
Step 9. Make a template the default, also for Odoo's own PDFs
In Settings → PDF Builder Connector → Default templates pick a template for Sales orders and one for Invoices. The lists fill in when the page opens; if you have just made a template in Studio, click Refresh templates. The default is preselected in Generate PDF.
Tick Use for Odoo's own PDF under a default to go further: Odoo's Print button, Send by email, the order confirmation email and the PDF your customer downloads from the portal then all come from your template instead of Odoo's standard report.
- Invoices are titled by what they are: invoice, pro-forma invoice, draft, cancelled invoice or credit note.
- Each version of a document is rendered once and kept in Odoo; printing or sending it again uses the kept PDF and no further credits. A change to the document, its lines or the template makes a new one.
- If erp2pdf.com can't be reached, Odoo prints its own report, so nobody is left without a PDF.
Step 10. Send emails designed in Studio (Pro plan)
On the Pro plan you can also design the email itself. In Studio open the
Emails tab, start from a starter or a blank email, write
the subject and the HTML body, and drag fields from the list into either
({{ partner_id.name }},
{{ money(amount_total) }},
{{ formatDate(validity_date, "DD.MM.YYYY") }}). The preview
shows the email filled with one of your real Odoo records. Under
Attach PDF choose the PDF template to attach.
In Odoo, open a quotation or an invoice and choose Send by email (erp2pdf) from the gear menu. Pick the email template, check the recipients, subject and body, and click Send. The email goes out through Odoo's own mail server, the PDF is attached in the customer's language, and the message is logged in the chatter.
If something goes wrong
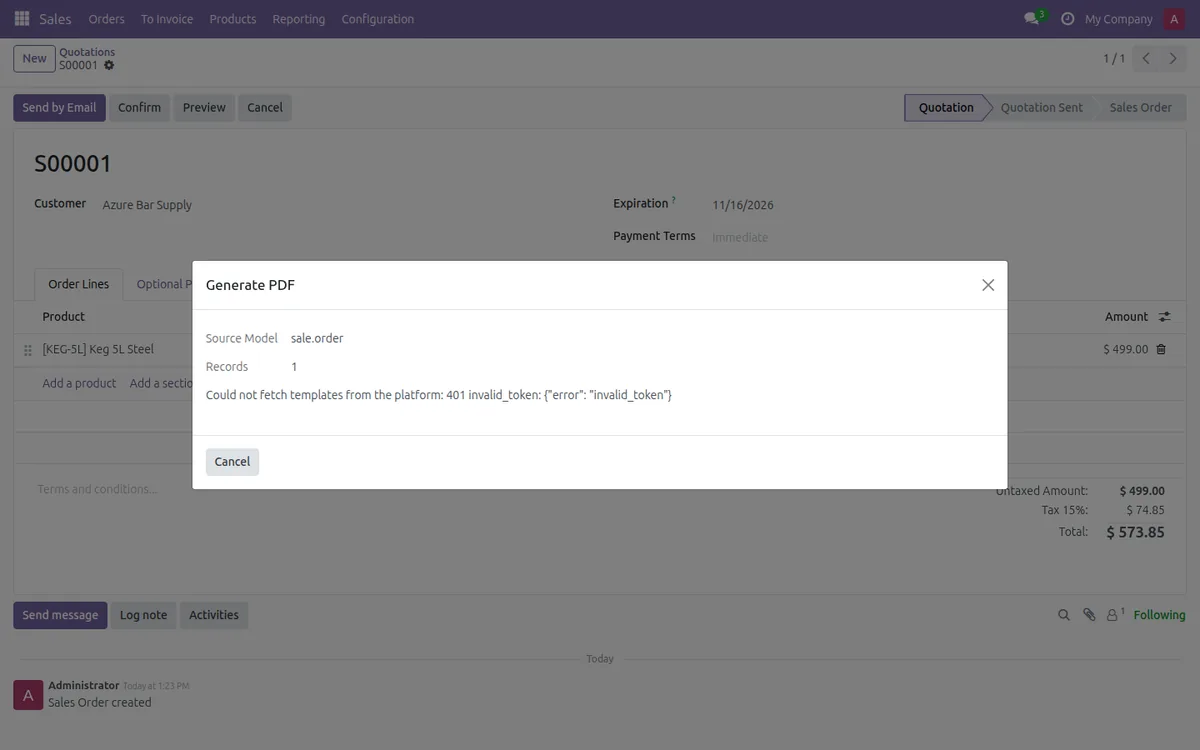
Errors appear in the Generate PDF dialog as
code: details.
| Error | What it means | What to do |
|---|---|---|
not_configured | SaaS URL, API Token or HMAC Secret is empty | Fill in all three in Settings → PDF Builder Connector and save |
401 invalid_token | The API token is wrong, revoked or deleted | Create a new token (step 3) and paste both new values |
401 invalid_signature | The HMAC secret doesn't match the token, or was pasted with extra characters | Paste the secret again, exactly as shown |
401 stale_timestamp | Your Odoo server's clock is more than 5 minutes off | Sync the server clock (NTP) |
403 domain_mismatch | Your account is locked to a different Odoo address | Check web.base.url and the Connector URL. If you moved Odoo, write to [email protected] to unlock |
400 invalid_origin | The Odoo address isn't a valid https://host (plain http is refused) | Fix web.base.url or the Connector URL |
402 upgrade_required | Your plan doesn't include the connector | Upgrade to Pro in the cabinet, Subscription |
402 insufficient_credits | Not enough credits left for this PDF | Top up credits or wait for the next billing cycle |
404 template_not_found | The template was deleted in Studio | Reopen the dialog to refresh the list |
413 payload_too_large | Too many records or too much data in one PDF | Select fewer records (up to 200) |
transport | Odoo couldn't reach erp2pdf.com | Check the SaaS URL and that your Odoo server can make outgoing https requests |
| No templates in the list | No Studio template is bound to this model | In Studio, bind a template to sale.order, product.template or res.partner |
Remove the connection
- In erp2pdf.com: open API tokens and click Revoke. Odoo loses access at once.
- In Odoo: clear the API Token and HMAC Secret in Settings → PDF Builder Connector, or uninstall the module.
What data is shared
- When you click Generate PDF, Odoo sends erp2pdf.com only the fields the chosen template uses, for the records you selected, read with your own Odoo permissions. The same holds for Print, Send and the portal when a template replaces Odoo's own PDF, and for Send by email (erp2pdf); the email is sent by your Odoo, not by erp2pdf.com.
- When you preview in Studio with real data, erp2pdf.com asks your Odoo for one record and for the lists of models and fields to pick from — only for sales orders, purchase orders, invoices, contacts, products, companies and the extra models you listed. Users, system, payment and HR records are never readable, and neither are passwords, tokens, keys or fields only administrators can see.
- Every request between the two is signed with your HMAC secret, expires after 5 minutes and can't be replayed; your Odoo rejects anything else.
- Everything travels over https. Generated PDFs are attached to the Odoo record; erp2pdf.com keeps the request and the PDF for 30 minutes so a retried click doesn't charge you twice.
No Odoo yet, or want to see the result first? The demo opens on a finished catalog page built from sample products.